5' X 8' TANDEM AXLE TRAILER: TONGUE
The tongue shown is designed for a straight coupler and is able to be fitted with a hydraulic surge coupler if required. This design allows the tongue to be longer giving the trailer better road handling and stability. See the Tongue design section for more details.
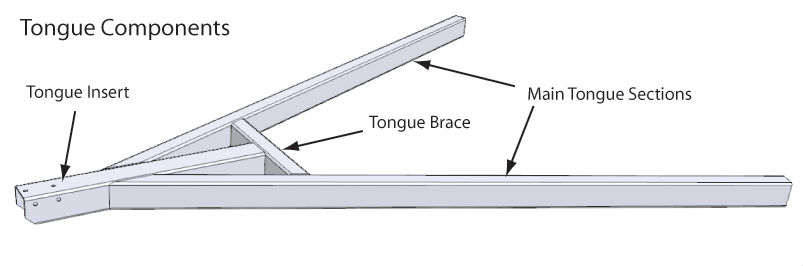
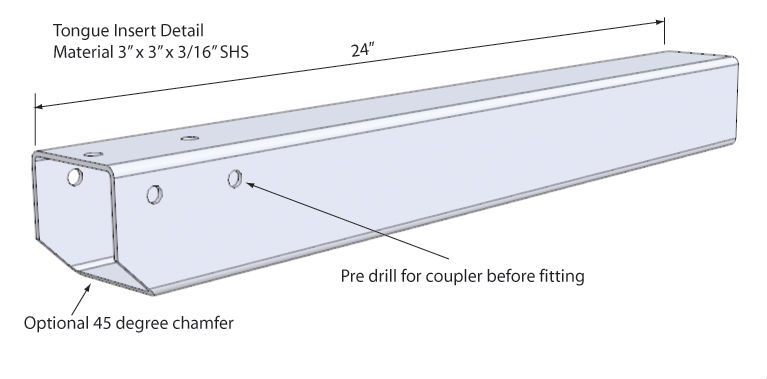
The tongue is made up of 4 components, the 2 main tongue sections, the tongue insert, and the tongue brace. It is possible to fit a full length tongue insert so that it goes under the chassis (composite tongue).
This will increase the strength of the tongue, but will add additional unnecessary weight.
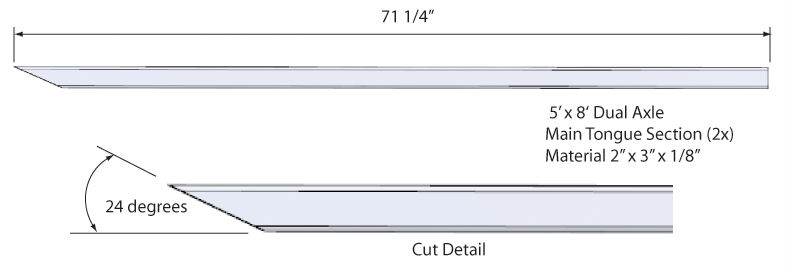
Measure and mark your main tongue sections for both length and cut angle. Double check your measurements and trim the end of the section at 18 degrees.
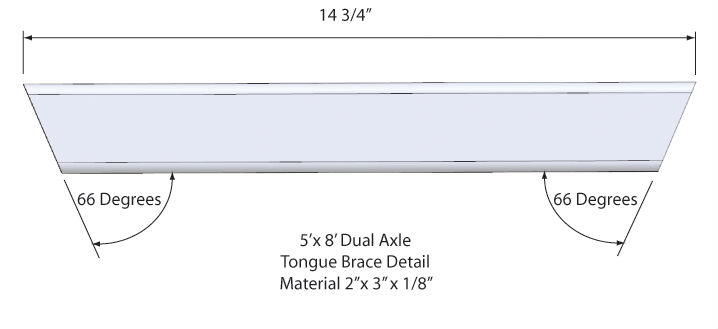
 Measure and mark out the tongue brace, again, double check your measurements and trim each end to 72 degrees.
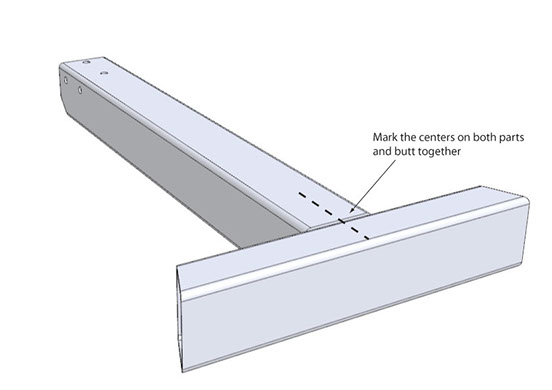
Find the center of the tongue brace (5 7/8") and mark. Do the same with the butt end of the tongue insert (1 1/2") and sit the two pieces together on a flat surface. Check the two pieces are square to each other and tack weld. Check for square again and once you are sure that everything is as it should be, run a couple of extra tack welds to hold it all secure.
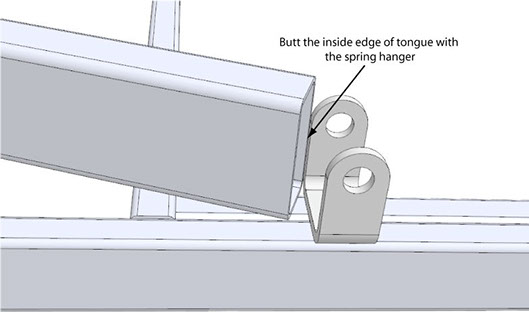
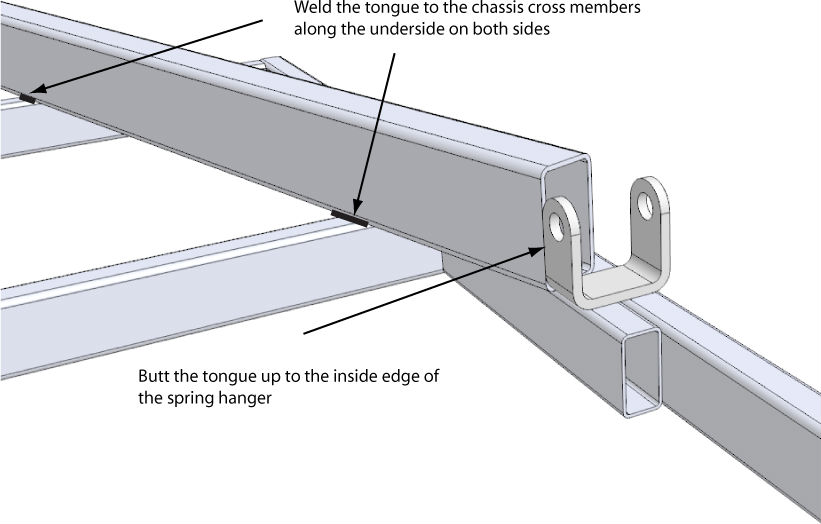
Lay the two tongue sections down the center of the trailer parallel with the chassis rails with the long edge vertical and the angle cut faces together. Take one section and slide the inside end around till the inside edge is resting against the inside upright of the spring hanger and tack weld in position.
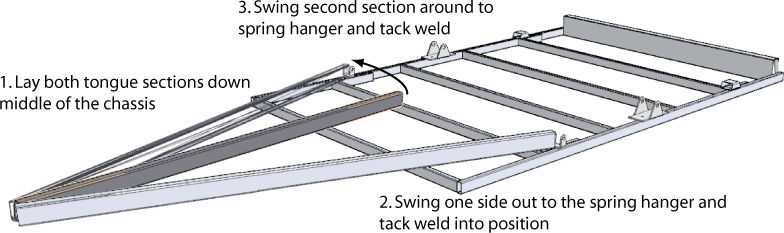
Repeat with the second section and then take the protruding sections and work them gently and evenly until the inside angle cut edges are approximately 3" apart. Clamp a couple of pieces of straight steel or lumber under the tongue so you can rest the tongue insert and brace section.
Fit the tongue insert between the main tongue sections (check that it is fitted upside down!) and adjust until the brace is just touching each side of the main tongue sections and that these are touching the insert. Clamp or lightly tack weld the insert to the main tongue sections.
At this point it is a good idea to double check that the tongue is central and to do this take a couple of measurements from the same point from the front of the tongue main section diagonally back to a point on the chassis in a couple of positions and check that both measurements from each side match.
Adjust the position of the main tongue sections until they have equal measurements and clamp into position.
Do the same thing with the tongue insert. Measure from each side of the end of the insert back to the chassis and adjust until both measurements match.
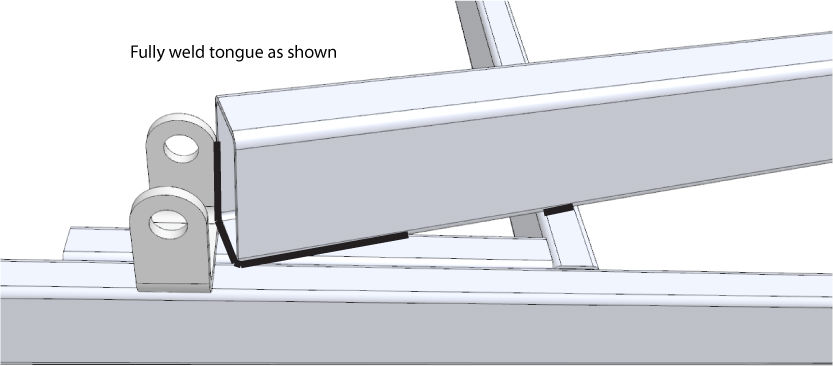
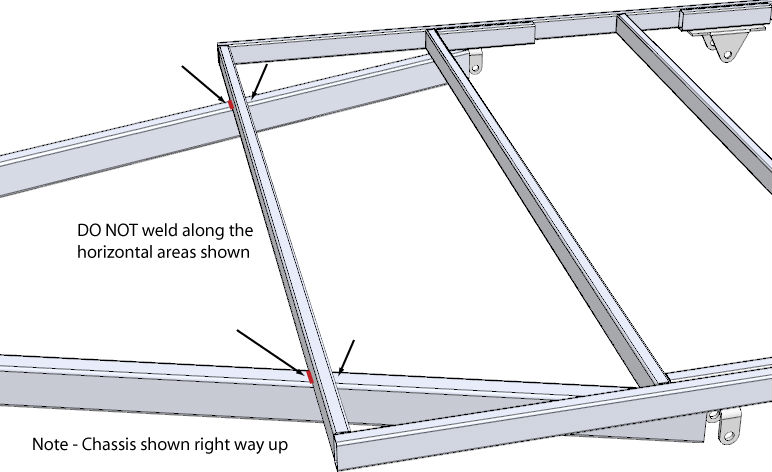
At this point you can weld up the tongue sections, brace and insert in all the down hand and vertical positions. Do not under any circumstances weld across the horizontal faces on the tongue where it intersects the cross members as shown below.
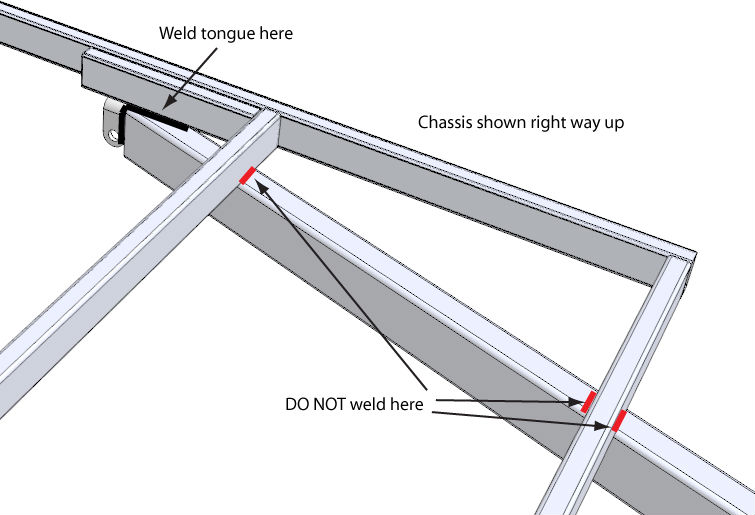
At this point you can weld up the tongue in all the down hand and vertical positions. Do not under any circumstances weld across the horizontal faces on the tongue where it intersects the cross members as shown below.